


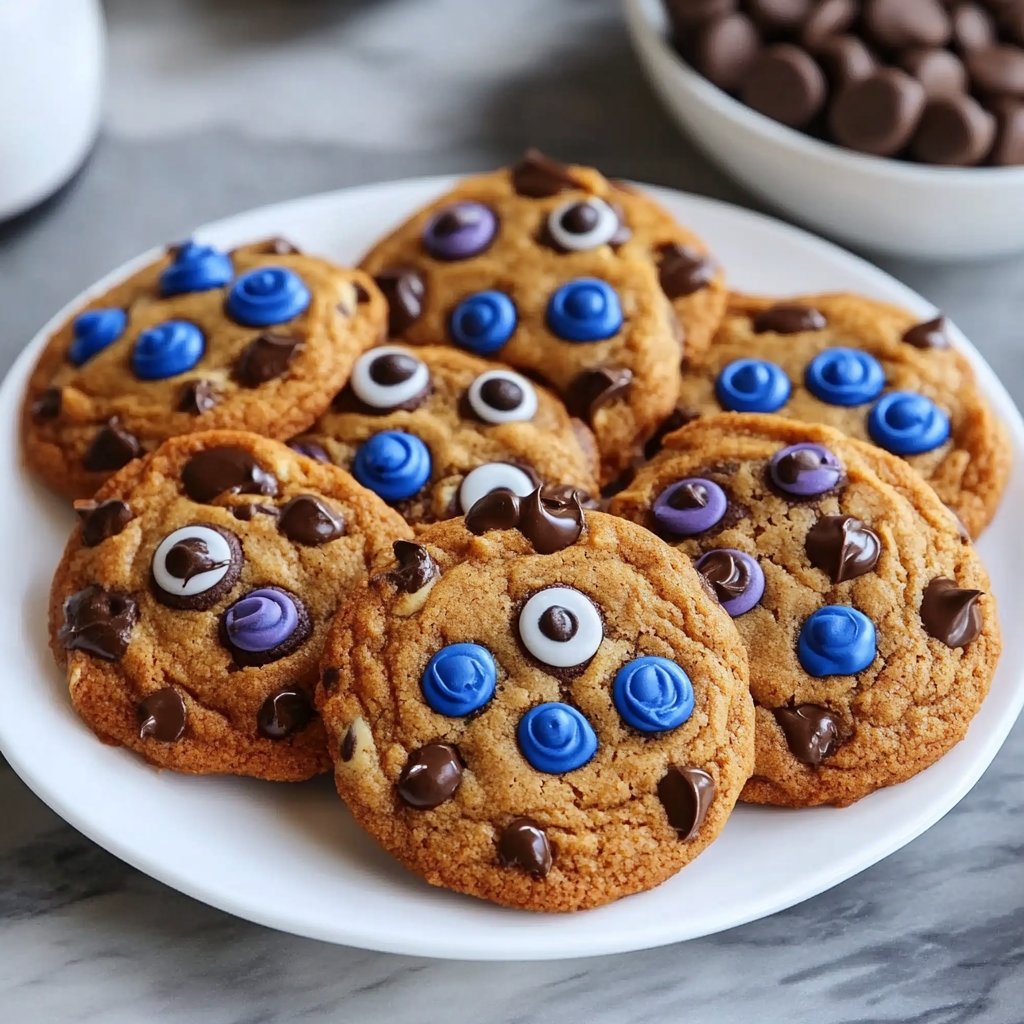
Who hasn’t dreamed of baking a treat as iconic as the cookie-loving monster himself? Whether you’re planning a kid’s birthday or just craving a sweet, nostalgic snack, the cookie monster cookie recipe brings joy to every bite. These blue, eyeball-adorned treats aren’t just a dessert—they’re a celebration of childhood favorites come to life in your kitchen.
Picture this: your oven humming, the smell of warm dough filling the air, and the pride of crafting cookies that look as fun as they taste. The cookie monster cookie isn’t just a bake—it’s a chance to connect with family, spark creativity, and create memories. Even Sesame Street’s most famous fan would approve.
Key Takeaways
- Follow a simple cookie monster cookie recipe using everyday ingredients.
- Perfect for parties, gifts, or everyday baking fun.
- Decorate with edible eyes for that classic Cookie Monster look.
- Adaptable for all skill levels—no baking expertise required.
- Add a playful twist to classic chocolate chip cookies with vibrant blue dough.

The Story Behind Cookie Monster Cookies
Every blue monster cookie has a story. It begins with Sesame Street’s beloved cookie fan. This tale inspires both bakeries and home cooks.
Who is Cookie Monster?
Cookie Monster, the blue Muppet, debuted on Sesame Street in 1969. He’s famous for his “C is for Cookie” song. His love for cookies has made him a baking icon.
His big eyes and blue fur make him a hit for treats like the cookie monster cookie. Fans around the world love him, making his image a baking sensation.
The Rise of Character-Themed Desserts
Character-themed desserts are all over parties and social media. They’re a hit because they’re colorful and bring back memories. Here’s why they’re so popular:
- Perfect for themed events like birthdays or TV show marathons
- Easy to customize with colorful ingredients
- Generate excitement through visual storytelling
Why These Cookies Win at Parties
Picture giving out blue monster cookies with candy eyes. It’s more than a snack—it’s a conversation starter. They’re great for kids’ parties, family gatherings, or adult retro-themed events.
The recipe is flexible, so you can change up the toppings. This makes every batch special. These cookies are fun to make and share, making your party’s dessert table the star.
Essential Ingredients for Your Cookie Monster Cookie Recipe
To make blue cookie monster cookies, you need the right stuff. This list makes sure your cookies are bright and fun. Let’s go through what you’ll need step by step.
The Base Cookie Ingredients
Start with basic baking items: unsalted butter, granulated sugar, brown sugar, all-purpose flour, baking soda, salt, an egg, and vanilla extract. These ingredients make soft, tasty cookies that keep their shape.
Blue Food Coloring Options
- Liquid food coloring: Gives deep blue colors but might need more drops.
- Gel food coloring: Great for bold, lasting colors in the dough.
- Butterfly pea flower powder: A natural choice for an organic blue color.
Try colors on a small dough sample first. This helps get the Cookie Monster’s exact blue shade.
Candy Eyes and Where to Find Them
Round candy eyes are key for the Cookie Monster look. Here’s what you need:
- Wilton Candy Melts or black decorating gel for eye outlines.
- Buy pre-made candy eyes online at Amazon or craft stores like Michaels.
Chocolate Chip Variations
| Option | Purpose | Best For |
|---|---|---|
| Mini chocolate chips | Create small “cookies” on top of the blue dough. | Perfect for realistic Cookie Monster expressions. |
| Semi-sweet chips | Add classic chocolate flavor without overwhelming the blue base. | Use in the dough or as accents. |
Try milk chocolate for a sweeter taste, or white chocolate chips for a fun twist.
Kitchen Tools You’ll Need for Perfect Monster Cookies
To make the perfect cookie monster cookie, you need the right tools. These tools help your blue monster cookies come out perfectly every time. Here’s what you should get before you start:
- Measuring cups and spoons: Accurate measurements are key. Use stainless steel sets like OXO Good Grips for precise portions.
- Mixer: A hand mixer (like KitchenAid’s Mini) ensures butter and sugar blend smoothly. A stand mixer works too.
- Baking sheets: Non-stick pans or parchment paper prevent sticking. Add silicone mats like Silpat for even heating.
- Cookie scoop: A 2-tablespoon scoop (try Ateco’s stainless option) keeps dough portions uniform.
- Cooling rack: Wire racks let cookies cool without getting soggy.
Optional extras like piping bags and star tips let you pipe candy eyes or decorate creatively. A small offset spatula helps shape dough after baking. Always set up tools before mixing to avoid last-minute scrambles.
Investing in quality tools makes baking easier. Proper gear ensures your blue monster cookies look as fun as they taste. Ready? Let’s start mixing!
Preparing Your Cookie Monster Cookie Dough
Getting your cookie monster cookie dough just right is crucial. Follow these steps to mix, test, and prepare your dough like a pro.
Mixing the Perfect Blue Dough
Begin by creaming softened butter and sugar until it’s light and fluffy. Then, add eggs and vanilla. Next, blend in dry ingredients slowly.
To get that iconic blue color, use gel food coloring like Americolor or Wilton. Add it drop by drop. Stop mixing once streaks of blue are still visible. This avoids tough cookies.
Tips for Getting the Right Texture
- Test dough consistency: It should hold shape when pinched. Too sticky? Add 1 tsp flour. Too dry? Mix in a splash of milk.
- Chill if dough is too soft; refrigerate 15-20 minutes to firm up without altering flavor.
- For crisp edges and chewy centers, bake directly from room temperature dough.
Chilling vs. Not Chilling Your Dough
| Option | Pros | Cons |
|---|---|---|
| Chill Dough | Prevents spreading, deeper flavor | Longer prep time |
| Use Room Temp Dough | Faster process, softer texture | Risk of spreading too much |
Choose based on desired texture. For the cookie monster cookie recipe, chilling is optional but recommended for structured shapes. Adjust as needed, and proceed to baking once your dough is ready!
The Secret to Vibrant Blue Monster Cookies
Want your blue cookie monster cookies to really pop? The secret is in mastering the color. Professional bakers use gel food dyes like Wilton Icing Colors or Americolor Soft Gel. These colors stay bright even after baking. But, stay away from liquid dyes—they lose color fast in the oven.
- Start with gel food coloring: Mix 1–2 teaspoons into butter or oil before adding flour.
- Test the color on a spoon before mixing the dough. This helps avoid too much color.
- Don’t overmix. Stop once the dough is well combined.
“For maximum vibrancy, let colored dough rest 10 minutes before baking. This lets hues set properly.” – Wilton Baking Institute
Looking for a natural option? Try butterfly pea flower powder or spirulina extract. These plant-based options give a softer blue but need careful measuring. Overbaking can make them gray—bake for exactly 10–12 minutes. If edges gray too soon, try baking at 15°F lower next time.
Still having trouble? Check your food dye’s shade. Some “blue” gels have green undertones. Test brands like Americolor Super Blue for true blue. Add color slowly—1 drop at a time—to avoid turning your blue monster cookies green or purple.
Step-by-Step Baking Instructions
Learning to bake the Cookie Monster cookie recipe is key. It helps you get the right texture and that bright blue color. Here’s how to use your oven to make those famous treats:
Ideal Oven Temperature and Timing
First, heat your oven to 350°F (175°C). Put parchment-lined baking sheets in the oven to warm up. Then, scoop the dough into balls, leaving 2 inches between each one. This keeps them from merging and helps them stay round.
Bake for 10–12 minutes. If you have a convection oven, you might need 2–3 minutes less.
How to Tell When Cookies Are Done
Start checking the cookies at 10 minutes. They should have lightly golden edges but still be soft in the middle. A slightly soft center will firm up as they cool.
It’s important to watch them closely to avoid overcooking. Overdone edges can become dry and crispy.
Cooling Process for Perfect Results
Let the cookies cool on the baking sheet for 5 minutes. This helps the edges firm up while keeping the center moist. Then, move them to a wire rack to cool completely.
By following these steps, your cookies will look just like Cookie Monster’s. Paying attention to oven temperature and cooling time is crucial for that perfect squishy texture.
Adding the Cookie Monster Face Features
Make your blue cookie monster cookies come alive with these easy steps. Decide when to put on candy eyes: attach them to dough before baking for a strong hold, or wait until they cool for easier placement. For the mouth, arrange mini chocolate chips in a crescent shape. Use melted chocolate to stick them to the cookie.
- Eyes: Use nonpareils or small candy pieces as pupils. Add after baking for precise placement.
- Mouth: Create a wide “cookie-shaped” grin using mini chocolate chips. Press them firmly into cooled dough.
- Details: Outline facial features with black icing for contrast. Add eyebrows with white icing for extra character.
Fix slipping decorations by dabbing frosting underneath candies. For a fuzzy texture, drag a fork lightly over the cookie’s surface while the blue dough is slightly softened. Let kids help shape mouths or sprinkle details—this step makes baking a fun family craft. Avoid overcrowding features; leave space between elements for clarity. Test decorating techniques on one cookie first to perfect your style before applying to all your cookie monster cookie batches. These steps ensure your treats mirror Cookie Monster’s playful expression, ready for parties or gifts.
Creative Cookie Monster Designs and Variations
Try new things with blue monster cookies. They’re great for parties or special diets. You can still keep their fun look.
Mini Cookie Monster Bites
Make your blue monster cookies smaller. Use a small scoop for dough. Add tiny candy eyes and mini chocolate chips. Bake for 2–3 minutes less to stay soft. They’re perfect for kids’ parties or holiday snacks!
Sandwich Cookies with Flavored Fillings
Make your cookies into layered treats. Pair two halves with creamy fillings. Try these cookie monster cookie combos:
- Vanilla buttercream with blue food coloring for a vibrant center
- Chocolate ganache for a rich, melty contrast
- Cookies ‘n’ Creme filling to mimic the Sesame Street character’s iconic craving
Use a piping bag to pipe filling neatly between cooled cookies.
Gluten-Free Blue Monster Cookies
Make blue monster cookies for everyone with these swaps:
- Replace all-purpose flour with a 1:1 gluten-free blend (try King Arthur or Bob’s Red Mill).
- Add 1 tsp xanthan gum to prevent crumbliness.
- Reduce oven time by 5 minutes to avoid drying.
Test batches first to adjust texture—your gluten-free guests will love these treats!
Storage Tips for Keeping Your Blue Cookie Monster Cookies Fresh
Keeping your blue cookie monster cookies fresh is key. Follow these steps to keep them fresh and colorful. Whether you’re getting ready for a party or saving leftovers, these tips will help.
For short-term storage (3-5 days):
- Place cookies in airtight containers or jars with tight seals.
- Separate layers with parchment paper to avoid color transfer.
- Store at room temperature (68–72°F) away from direct sunlight.
| Storage Method | Ideal Timeframe | Best Practices |
|---|---|---|
| Room Temperature | 3–5 days | Use containers with parchment-lined layers. |
| Refrigerator | Up to 1 week | Wrap in parchment, then seal in containers. Let them thaw at room temperature before serving. |
| Freezer | 2–3 months | Wrap each cookie individually in parchment. Place in airtight freezer bags. Use moisture-proof bags to prevent freezer burn. |
Freezing tips for longer storage:
- Cool cookies completely before freezing to avoid condensation.
- Date and label containers for tracking freshness.
If candy eyes shift during storage, gently reposition with clean hands. For dried-out cookie monster cookies, warm them briefly at 250°F for 2–3 minutes. Avoid stacking decorated cookies to prevent smudging. Always use airtight containers to protect against humidity and air exposure.
Serving Ideas for Your Cookie Monster Creations
Make your cookie monster cookie recipe stand out with fun serving ideas. These blue treats are more than just snacks. They’re a way to celebrate in style.
Cookie Monster Themed Parties
Make any party a Sesame Street bash. Use cookie arrangements to create Cookie Monster face platters. Add Sesame Street figures or themed cupcakes for a complete look.
Serve cookies on blue plates or with “alphabet soup” snacks for a fun twist.
Pairing with Milk and Beverages
Choose drinks that fit the Cookie Monster theme. Try blue-tinted milk or milk alternatives like almond or oat milk. For a special touch, serve hot chocolate in blue mugs or a blueberry mocktail.
Adults might enjoy dessert wine or spiced chai tea to balance the cookie’s sweetness.
Gifting Your Cookies
Wrap cookies in cellophane bags with blue ribbon for a nice gift. Include a tag with a quote like “Me love cookies!” or a recipe card. For bigger gifts, use tiered stands or mason jars filled with cookies and blue candies.
Online stores like Amazon or Michaels have themed packaging supplies.
“The key to memorable desserts is presentation,” says baking expert Emily Clark. “Pairing color, theme, and creativity makes every bite a celebration.”
Conclusion: Enjoying Your Homemade Cookie Monster Treats
Your blue monster cookies bring Cookie Monster’s fun to life in every bite. From making the dough to adding candy eyes, baking becomes an exciting journey. Share them at parties, family events, or as fun gifts.
These cookies are more than snacks; they’re a trip back to childhood and a chance to be creative. Use leftover dough to make mini cookies or add extra layers for more taste. Keep them fresh by storing them right.
Post pictures of your creations online and use #CookieMonsterCookies. It’s a great way to show off your baking talent. These cookies are perfect for any Sesame Street-themed party or just a sweet treat.
Learning to make blue monster cookies opens up a world of themed baking. Try gluten-free versions or new colors. The joy is in the process, from mixing to decorating. Let your creativity lead to new flavors and designs. Homemade treats are truly special.
FAQ
What are Cookie Monster cookies?
Cookie Monster cookies are bright blue treats inspired by Sesame Street’s Cookie Monster. They have a chewy cookie base and look like Cookie Monster’s face. They often have candy eyes and chocolate chips for the mouth.
How do I make Cookie Monster cookie dough?
Start by creaming butter and sugar together. Then add eggs, vanilla, and dry ingredients. Use blue food coloring for the iconic color. Choose your favorite chocolate chips.
Can I use different types of blue food coloring?
Yes, you can use liquid, gel, or powder blue food coloring. Gel coloring gives the best color. Natural options like butterfly pea powder are also good.
How long do Cookie Monster cookies stay fresh?
Cookie Monster cookies stay fresh for 3-5 days at room temperature. To keep them longer, freeze them wrapped individually or in batches.
What do I do if my Cookie Monster cookies turn green instead of blue?
If cookies turn green, it’s from mixing too much after adding color. Add color slowly and mix just until combined. This avoids overmixing.
How can I serve Cookie Monster cookies at a party?
Serve them on themed platters or with other Sesame Street treats. Enjoy with blue milk or hot chocolate for fun.
Are there gluten-free options for Cookie Monster cookies?
Yes, use gluten-free flours like almond or rice flour. Adjust baking times for the right texture.
Can I decorate Cookie Monster cookies with my kids?
Absolutely! Decorating them is a fun family activity. Let your kids add candy eyes and other decorations.
What kitchen tools do I need for baking Cookie Monster cookies?
You’ll need measuring cups and spoons, a mixer, cookie sheets, a cooling rack, and cookie scoops. Piping bags can make decorating easier.


